Please note, this post may contain Amazon Associates affiliate links as part of their program. If you make a purchase through these links, I may earn a commission at no additional cost to you. All opinions expressed here are entirely my own, based on my personal experience and research.
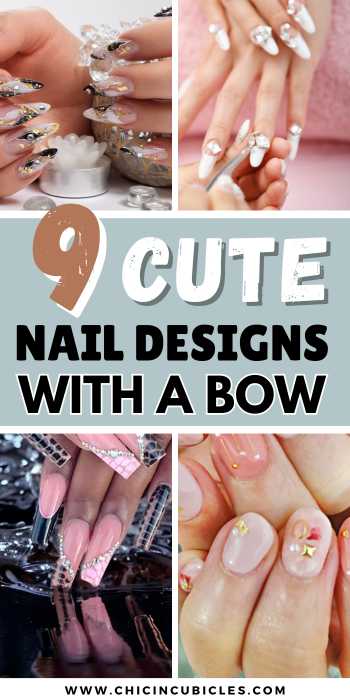
Let’s take a look at 9 Cute Nail Designs With a Bow That Are On Point and perfect for any occasion. Nail art has become a popular trend in recent years, with people experimenting with different colors, patterns, and designs to make a statement. One of the most popular nail art designs is the bow design, which adds a cute and playful touch to any manicure. From subtle to bold, there are many ways to incorporate a bow into your nail art.
Whether you’re looking for a simple and elegant design or something more intricate, there are plenty of bow nail art ideas to choose from. Some designs feature a single bow on one or two nails, while others incorporate bows into the overall pattern. With so many options, you’re sure to find a bow nail design that suits your style and personality.

The Charm of Bow Nail Designs
Bow nail designs are a charming way to add a touch of femininity to your nails. The small and simple design of a bow can make a big impact on the overall look of your nails. Here are 9 cute nail designs with a bow that are on point.
1. Simple Bow
The simple bow nail design is perfect for those who want a cute and subtle look. It features a small bow on one or two nails, usually on the ring finger. This design is great for any occasion and can be done in any color.

2. Glitter Bow
The glitter bow nail design adds a touch of sparkle to your nails. It features a small bow with glitter accents on one or two nails. This design is perfect for a night out or a special occasion.

3. Polka Dot Bow
The polka dot bow nail design is a fun and playful way to add some personality to your nails. It features a small bow with polka dot accents on one or two nails. This design is great for those who love a retro look.

4. Striped Bow
The striped bow nail design is a chic and stylish way to add some flair to your nails. It features a small bow with striped accents on one or two nails. This design is perfect for those who love a modern and trendy look.

5. Floral Bow
The floral bow nail design is a beautiful way to add some nature-inspired beauty to your nails. It features a small bow with floral accents on one or two nails. This design is great for spring and summer.

6. Ombre Bow
The ombre bow nail design is a unique and eye-catching way to add some color to your nails. It features a small bow with an ombre effect on one or two nails. This design is perfect for those who love a bold and vibrant look.

7. French Tip Bow
The French tip bow nail design is a classic and elegant way to add some sophistication to your nails. It features a small bow on the tip of the nails with a French manicure. This design is great for a formal event or a wedding.

8. Matte Bow
The matte bow nail design is a chic and modern way to add some texture to your nails. It features a small bow with a matte finish on one or two nails. This design is perfect for those who love a minimalist look.

9. 3D Bow
The 3D bow nail design is a fun and playful way to add some dimension to your nails. It features a small bow with a 3D effect on one or two nails. This design is great for those who love a unique and creative look.

Classic Bow and Polka Dot Combo
For a classic and timeless look, the combination of bows and polka dots is always a winner. This design is perfect for those who want a cute and playful look without being too over-the-top.
To achieve this look, start with a base coat of your favorite color. Once dry, add small polka dots using a dotting tool or toothpick. Then, add a small bow accent on one or two nails using nail glue or a small brush.
For a modern twist on this classic design, try using metallic polka dots or a matte base coat. You can also experiment with different bow sizes and colors to match your personal style.
Overall, the classic bow and polka dot combo is a fun and easy nail design that is perfect for any occasion. Give it a try and show off your cute and playful side!
Romantic Floral and Bow Designs
For those who adore flowers and bows, this nail design is perfect for you. The combination of delicate flowers and cute bows will make your nails look romantic and feminine. Here are some ideas to try out:
- Floral Accent Nail with Bow: Paint your nails a light pink shade and add a floral accent nail on your ring finger. Complete the look with a cute bow on top of the flowers.
- Floral French Tip with Bow: Create a French tip with a light pink shade and add a floral design on the tip of your nails. Then, add a small bow on top of the floral design.
- Floral and Bow Mix and Match: Paint each nail with a different floral design and add a small bow on top of each one. This mix and match look is perfect for those who love variety.
- Floral and Bow Ombre: Create an ombre effect with a light pink shade and add a floral design on your nails. Finish the look with a small bow on top of the floral design.
These romantic floral and bow designs are perfect for any occasion, whether it’s a wedding, a date night, or just a day out with friends. Try out these designs and add a touch of romance to your nails.
Bold 3D Bow Nail Art
For those who want to add a touch of drama to their nail art, bold 3D bow designs are the way to go. These designs are perfect for special occasions or when you simply want to make a statement.
One way to achieve this look is by using acrylic or gel to create a raised bow design on the nail. The bow can be in any color, but black or white bows on a bold base color such as red or blue can create a striking contrast.
Another option is to use pre-made 3D bow stickers or decals. These can be easily applied to the nail and come in a variety of colors and designs. For a more subtle look, try using smaller bows on just a few nails.
To really make the 3D bow design pop, add some glitter or rhinestones to the nail. This will add some sparkle and dimension to the overall look.
Overall, bold 3D bow nail art is a fun and playful way to add some personality to your nails. Whether you choose to create your own design or use pre-made decals, this is a trend that is sure to turn heads.
Seasonal Bow Nail Inspirations
Looking for some inspiration for your next bow nail design? Look no further than these seasonal bow nail inspirations!
Spring Fling Bows
Spring is the perfect time to add some cute and colorful bows to your nails. Try a pastel pink or blue base with a white bow for a fresh and delicate look. Or, go bold with a bright green base and a hot pink bow for a fun and playful vibe. Don’t be afraid to mix and match colors and patterns to create a unique and eye-catching design.
Winter Wonderland Bows
Winter is a great time to experiment with metallics and glitter. Try a silver or gold base with a white bow for a classic and elegant look. Or, go for a more whimsical design with a blue or purple base and a sparkly snowflake bow. Don’t forget to add some rhinestones or gems for some extra bling.
No matter what season it is, there’s always a way to incorporate a cute bow into your nail design. Whether you prefer a subtle and understated look or something bold and daring, these seasonal bow nail inspirations are sure to give you some ideas for your next manicure.
DIY Bow Nail Design Tips
Choosing the Right Tools
Before starting with the nail design, it’s essential to have the right tools to make the process easier. Here are some tools you might need:
- Nail polish remover
- Cotton pads
- Base coat
- Topcoat
- Nail polish colors of your choice
- Bow stickers or nail art pen
- Tweezers
Make sure to have all the tools on hand before starting with the nail design.
Step-by-Step Application
- Start by removing any old nail polish with a cotton pad and nail polish remover.
- Apply a base coat to protect the nails.
- Choose the nail polish color of your choice and apply it to your nails. Let it dry completely.
- Once the nail polish is dry, use tweezers to carefully place the bow stickers on your nails. Alternatively, use a nail art pen to draw the bow design.
- Apply a topcoat to seal the design and protect the nails.
Remember to let each layer dry completely before moving on to the next step. With these simple steps and the right tools, anyone can create a cute bow nail design.
Please note, this post may contain Amazon Associates affiliate links as part of their program. If you make a purchase through these links, I may earn a commission at no additional cost to you. All opinions expressed here are entirely my own, based on my personal experience and research.


